Remodeling often turns a small bathroom detail into a schedule risk. A floor drain must align with the finished floor, waterproofing, and pipe location. A mismatch can mean recut tile, extra labor, or water pooling near the shower. Small part. Big consequences.
The 2024 U.S. Houzz & Home Study reported that 54% of surveyed homeowners renovated in 2023, with median renovation spending reaching $24,000. This is broad remodeling context, not floor-drain-specific evidence. Still, it shows why choices that affect installation time and rework deserve attention. For buyers comparing Chinese suppliers, check outlet diameter, drain-body dimensions, installation depth, grate finish, and compatibility with the planned waterproofing system. Ask for clear product drawings, material details, and installation instructions before ordering.
A Remodeling Easy Install Floor Drain can help simplify a project, but “easy install” is not a guarantee. Site conditions matter. Tile thickness, pipe position, and the installer’s method can change what fits. A polished product photo cannot answer every question. That is worth remembering. This guide introduces practical selection points for remodeling projects, including how to assess fit, materials, maintenance access, and supplier information. The best choice is not always the cheapest or quickest to describe. It is the one whose specifications match the actual floor assembly, with fewer surprises once the old tiles are removed.
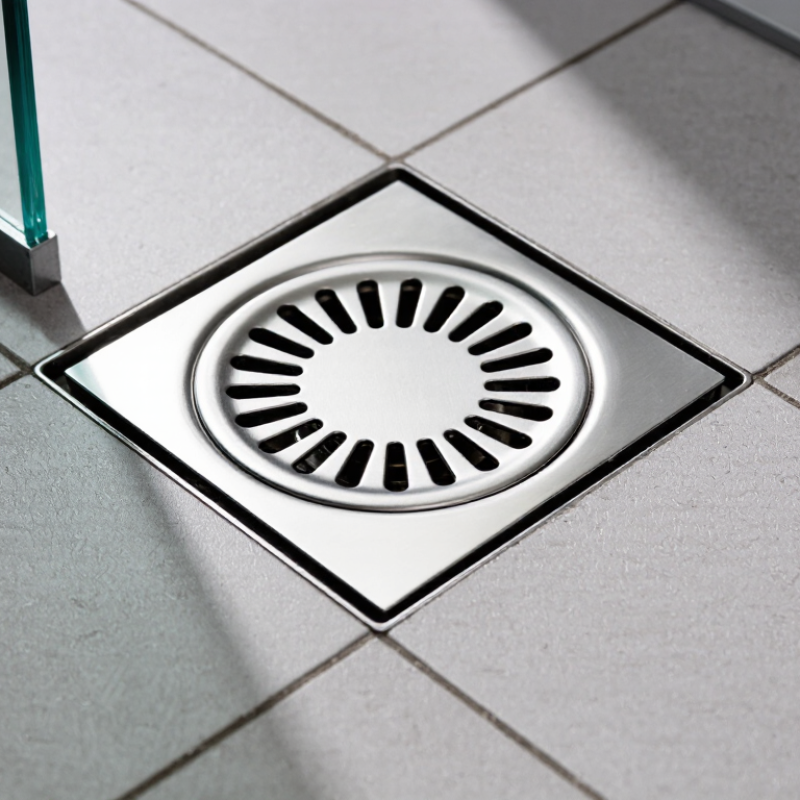
An easy-install floor drain should solve a real remodeling problem: fitting reliable drainage into a space with limited access. In older bathrooms, the existing pipe may sit slightly off-center, and the subfloor can be uneven. A drain with adjustable height and a compatible outlet size can make alignment easier. Measure the pipe and finished floor level before buying. Small mismatches matter.
Access matters, too. A removable grate and a drain body that can be positioned from above may reduce the need to open a larger section of flooring. Look for clear instructions, accessible fasteners, and a design that works with the chosen waterproofing system. During installation, check the slope toward the drain with a level; standing water near the wall is a warning, not a cosmetic detail. Follow the drain and membrane makers’ instructions, and confirm local plumbing requirements when needed.
Material choice affects daily use. A corrosion-resistant grate is practical in a damp shower, while a trap that can be cleaned without dismantling the floor saves effort later. Keep the finished grate level with the tile, allowing for mortar and tile thickness. It sounds simple. It isn’t always. Even a well-designed drain cannot compensate for poor sealing or incorrect pipe connections, so a careful dry fit before applying adhesive is worth the extra few minutes.
Remodeling often exposes a mismatch between the new drain and the existing pipe. Chinese manufacturers offer several floor drain types for different layouts. Common options include square point drains, linear drains, and tile-in models. A square drain suits a central floor outlet. A linear channel can collect water along a shower wall, but it needs a carefully formed slope.
Tile-in covers hide beneath a cut tile, creating a quieter visual line. Many models use stainless steel or brass, with removable grates for cleaning. Some include hair baskets, adjustable collars, or water-seal inserts to limit odors. These features vary by model, so check the product drawing rather than relying on photos. Small details matter.
For an older bathroom, confirm the outlet diameter, drain depth, and available floor height before ordering. Ask the supplier for installation dimensions and drainage capacity, then compare them with the project’s plumbing plan. A low-profile body may help where the floor cannot be raised much. One awkward point remains: “easy install” does not mean every drain fits every renovation. Fit beats appearance.
| Floor Drain Type | Common Format | Typical Outlet Options | Common Materials | Installation Features | Suitable Remodeling Applications | Key Checks Before Purchase |
|---|---|---|---|---|---|---|
| Square grate floor drain | Compact square grate; common grate sizes include approximately 100 × 100 mm, with other sizes available. | Often offered with 50 mm outlets; other outlet sizes depend on the drain body and plumbing system. | Stainless steel, ABS plastic, or combinations of metal grate and plastic body. | Simple grate-and-body layout; can be a straightforward replacement when the existing drain position and outlet match. | Bathroom floors, laundry rooms, and other areas with a point drain. | Measure the existing grate opening and outlet connection. Confirm overall body depth, floor build-up, and compatibility with the existing pipe. |
| Linear (trench) floor drain | Long, narrow channel with a removable grate; lengths vary by model and installation layout. | One or more outlets; outlet diameter and location vary by design. | Commonly stainless steel, with plastic or stainless-steel channel options. | Requires a prepared channel recess and suitable floor slope. Some models have adjustable feet or a height-adjustable frame. | Walk-in showers and larger wet-room areas where water is directed toward a line drain. | Check channel length, outlet position, drain capacity, waterproofing details, and whether the floor can be sloped to the channel. |
| Tile-insert floor drain | Reversible or recessed cover designed to accept a piece of floor tile; square and linear formats are available. | Varies by drain body; confirm the outlet size and direction for the specific model. | Usually a metal frame or cover, commonly stainless steel, paired with a compatible drain body. | The tile insert adds cover thickness and weight. Correct tile cutting and finished-floor height are important for a flush result. | Bathroom renovations where the drain cover is intended to blend with the surrounding tile. | Check insert depth, allowable tile thickness, cover lifting method, frame dimensions, and finished floor level. |
| Adjustable-height renovation drain | Drain body with an adjustable grate frame or riser; exact adjustment range is product-specific. | Commonly designed to connect to existing floor-drain piping; outlet options vary by model. | Plastic drain body with a metal or plastic grate and adjustment components. | Height adjustment can help align the grate with new tile or flooring, but does not eliminate the need for a compatible pipe connection and stable support. | Retiling projects where the finished floor height changes but the drain location is retained. | Measure available recess depth and new floor build-up. Verify adjustment range, outlet connection, sealing method, and access for cleaning. |
| Drain with integrated water seal or odor-control insert | Point or linear drain supplied with a water-seal trap or removable odor-control insert, depending on the design. | Outlet size and orientation depend on the body and trap arrangement. | Stainless steel, brass, or plastic components are used in different product configurations. | A water seal helps block sewer gases when maintained; mechanical inserts use a moving or sealing component and require periodic cleaning. | Bathrooms, utility rooms, and other locations where odor control is a priority. | Confirm the product’s trap arrangement, cleaning access, expected maintenance, outlet compatibility, and compliance with local plumbing requirements. |
Choosing a floor drain starts with the room, not the finish. A laundry room, garage, and walk-in shower handle different water volumes and debris. Measure the available pipe size and drain location before ordering. Moving a drain can mean cutting concrete or reworking waterproofing. Small detail. Big consequences.
The Harvard Joint Center for Housing Studies reported that U.S. home improvement and repair spending reached $472 billion in 2022 in its Improving America’s Housing 2023 report. That figure reflects a large remodeling market, but it does not tell you which drain fits your project. Check the drain’s stated flow capacity against the connected fixtures, and confirm pipe and trap requirements with a qualified plumber. Local codes vary.
For a shower, compare grate size, outlet position, and compatibility with the waterproofing system. For a utility area, consider a removable grate that makes cleaning easier. Check the load rating if carts or heavy equipment will pass over it. A low-profile model may simplify installation, but it cannot compensate for poor floor slope. That part is easy to overlook. Read the installation instructions before the tile is set, and verify the finished floor height on site. I would not assume “easy install” means every remodel is simple; older pipes and uneven slabs can change the plan.
For a remodeling project, start by checking the drain outlet, joist space, and finished-floor height. Dry-fit the drain body before applying mortar or sealant. The rim should sit level with the planned tile surface, not below it. Measure twice. A low rim can leave standing water; a high one can catch shoes and cleaning tools.
Connect the outlet to a trapped, properly vented branch, following the drain manufacturer’s instructions and local requirements. The 2024 International Plumbing Code, Table 704.1, specifies a 1/4-inch-per-foot minimum slope for drainage pipe 2½ inches or smaller. Its Section 1002.4 sets a 2-inch minimum trap seal in standard cases. Check local adoption before relying on these figures. Keep the pipe supported. Then test the assembly with water before closing the floor. A dry fit may look perfect, yet a small height error can still cause trouble. Confirm the waterproofing connection, clear construction debris, and inspect for leaks around the joints.
China Best Easy Install Floor Drain for Remodeling Projects
Drainage performance depends on more than a wide grate. Check the drain’s outlet size, body depth, and connection type against the existing pipe before cutting the floor. The 2021 International Plumbing Code specifies a water seal of 2 to 4 inches for typical fixture traps. That seal helps limit sewer gas entry, but it can evaporate in rarely used drains. After installation, pour water into the drain and watch for slow flow, leaks, or water pooling around the grate. A quick test can reveal a poor slope.
Tips: Lift the grate and remove hair, grout dust, and debris with a soft brush. Check the trap seal periodically, especially in guest bathrooms or utility rooms. During quality checks, confirm the grate sits flush and does not rock underfoot. Measure twice. It sounds obvious, yet it is easy to rush.
For remodels, keep the product’s installation instructions and test results with the project records. Verify the seal, joints, and drainage after nearby tiling is complete; construction debris can still enter the pipe. One detail is easy to overlook: a drain that performs well on day one may need regular cleaning as household use changes. The code provides a useful reference, but local requirements and site conditions still matter.
The bars show theoretical full-flow estimates for smooth circular pipes at a 1% slope, calculated with the Manning equation (n = 0.009) using the listed clear internal diameters. These are not floor-drain product ratings: grate, trap, pipe layout, and installation can limit actual flow. Check the drain and plumbing-system specifications for a project.
Start with the room, drain location, and available pipe size. A shower and laundry room handle different water volumes and debris. Measure before ordering.
Not always. Match the drain’s stated flow capacity to the connected fixtures. For utility spaces, a removable grate can make cleaning easier.
Check the grate size, outlet position, and compatibility with the waterproofing system. Confirm these details before the tile is installed.
Check its load rating. This matters when carts or heavy equipment may pass over the grate. A detail easy to miss.
It may help with floor height, but it cannot fix poor slope or uneven concrete. Older pipes can complicate the plan. I would not assume the job is simple.
Dry-fit it before applying mortar or sealant. Set the rim level with the planned tile surface. Measure twice.
Confirm the waterproofing connection, support the pipe, and test the assembly with water. Inspect joints for leaks and clear out construction debris.
Check the current location and pipe route first. Moving a drain may require cutting concrete or reworking waterproofing. Ask a qualified plumber about pipe and trap requirements. Local requirements vary.
Choosing the right Remodeling Easy Install Floor Drain can make a renovation more efficient while helping protect floors from standing water. This overview explains what makes a drain suitable for remodeling, including installation flexibility, dependable water flow, practical size options, and compatibility with common floor layouts. It also introduces drain types and useful features available from Chinese manufacturers, such as different grate designs, outlet configurations, and materials suited to various indoor spaces.
For a successful project, compare the drain’s dimensions and drainage capacity with the room’s needs, then prepare the floor and connect the outlet carefully during installation. After fitting the drain, check that it sits level, seals securely, and allows water to flow away without pooling. Regularly removing debris and inspecting the grate, seal, and drainage path can help maintain performance and identify issues early. These selection, installation, and upkeep considerations support a practical, durable remodeling result.

Xianglong