A Tool Free Easy Install Floor Drain can make a bathroom or laundry-room project feel more manageable, especially when its grate and fittings connect without specialized tools. Still, “tool-free” describes the product’s assembly, not every part of the installation. Pipe access, floor preparation, and waterproofing may require extra equipment or professional help.
Small details matter. Check the drain outlet size against your existing pipe, and read the manufacturer’s instructions before opening the package. A mismatch can mean delays. The finished floor should direct water toward the drain, while the drain body must sit securely and align with the surrounding surface. Keep the seal and waterproofing layers in view; covering them too early makes problems harder to spot.
Test before finishing. Pour a modest amount of water around the drain and look below, if the plumbing is accessible, for signs of leakage. Also check that water flows freely and does not pool at the edges. It is tempting to trust a quick visual check, but that can miss a slow leak. Be patient. The seven tips ahead cover preparation, fit, sealing, and final checks, with practical reminders for avoiding common installation mistakes. Every floor and plumbing layout differs, so use the product’s instructions and seek qualified assistance when the connection or waterproofing is unclear. One overlooked measurement can undo a neat-looking job. A little caution helps.
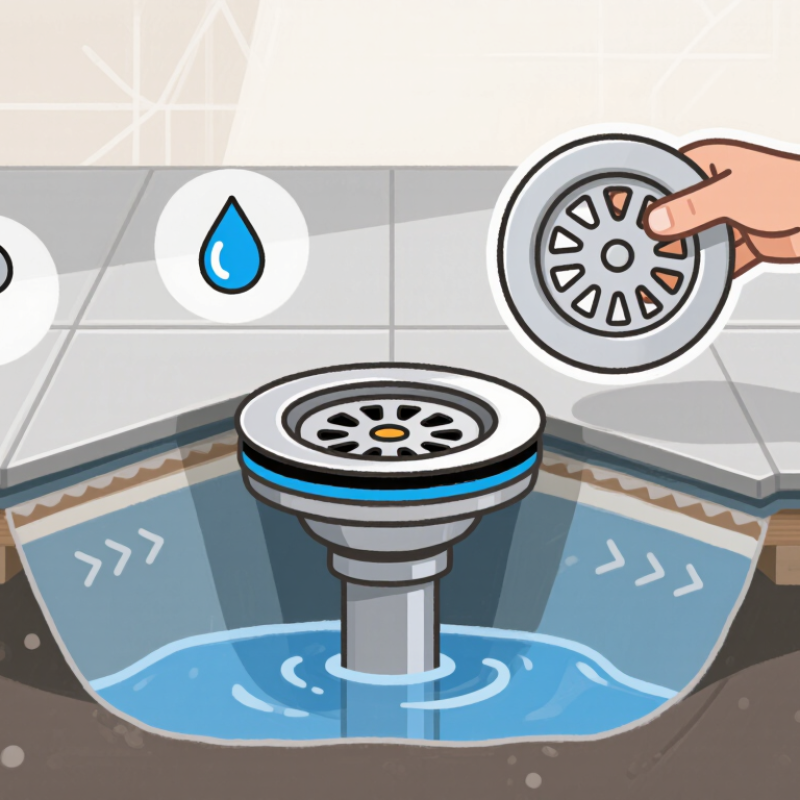
Before choosing a tool-free floor drain, compare its connection details with the drain body already in your floor. Check the grate dimensions, sealing collar, outlet direction, and pipe material. A drain that looks similar may not lock securely or seal against your waterproofing layer. Measure the opening twice, including the pipe’s inside diameter. Small details matter.
Outlet size affects how easily water leaves the drain. Confirm whether the outlet is vertical or horizontal, then match its diameter to the waste pipe without relying on a loose adapter. Also check the manufacturer’s published flow rating and its test conditions. A rating measured with a certain water depth may not reflect your shower’s actual setup. Compare the rating with the combined flow from the fixtures that may run at once. Do not guess.
During installation, dry-fit the parts before removing protective film or applying sealant. I have seen rushed installs hide a small mismatch until water pools near the grate. If the drain’s rating, outlet, or connection method is unclear, pause and ask the manufacturer for the technical drawing. A simple tool-free connection is convenient, but it still needs a compatible pipe and a sound waterproof seal.
A shower floor should guide water steadily toward the drain, not leave it standing in shallow pockets. A common target is a 1/4-inch drop for every foot of horizontal distance. That equals a 1-inch fall over four feet. Measure from the drain to the farthest wall, then set the floor height before placing the finished surface. A tool-free drain may simplify assembly, but it does not create the correct slope by itself.
Tips: Mark the planned fall on the walls. Use a straightedge and a level with a 1/4-inch spacer to check each section. Keep the drain opening clear while working. Check again.
The slope should feel even under a straightedge, with no abrupt dips or raised ridges. For a centered drain, the floor often slopes from several directions, so check each plane separately. I have found that rushing around the drain is an easy mistake; small height changes can redirect water. Small errors show. Follow the drain and flooring instructions, and verify the required slope for your specific installation before the surface cures. A quick water test can reveal a low spot, but it cannot replace careful measuring during installation.
A clean, flat seating surface helps the gasket seal evenly. Remove grit, old sealant, and moisture from the opening before placing the drain body. Check that the gasket is the correct type and orientation for the drain. Follow the installation instructions, since gasket shapes and seating methods can differ. Small details matter.
Lower the body into the opening without dragging the gasket across sharp edges. Keep the body level, then press down gently and evenly around its rim. Watch the gasket as you work. It should stay flat, with no folded edge or section squeezed out of place. A slight tilt can look harmless, but it may leave uneven pressure beneath the rim. Avoid forcing the assembly; resistance may mean something is misaligned. Pause and check.
Once seated, secure the drain only as directed. Tool-free does not mean pressure-free: overtightening by hand can still distort a soft gasket. Wipe away any excess material, if the instructions allow it, and inspect the joint from several angles. Run a small amount of water through the drain, then check beneath and around the opening for dampness. If you see a leak, reseat the gasket rather than masking the area with extra sealant. I would not skip that test, even when the fit looks neat.
| Tip | Installation step | What to check | Avoid |
|---|---|---|---|
| 1 | Read the drain and shower-system instructions before assembly. Confirm the drain type, compatible pipe size, and required installation sequence. | The drain, gasket, and connecting pipe are specified as compatible; local plumbing requirements are followed. | Assuming all tool-free drains use the same gasket position or connection method. |
| 2 | Check that the drain opening and surrounding surface are clean, sound, and free of debris that could interfere with seating. | The opening is not obstructed, and the drain body can sit flat without rocking. | Forcing the body into an opening that is too small or uneven. |
| 3 | Inspect the gasket for cuts, cracks, dirt, twists, or other visible damage before installation. | The gasket is clean, flexible, and positioned in the correct groove or location specified by the instructions. | Using a damaged gasket or applying unapproved lubricant or sealant. |
| 4 | Align the drain body squarely with the opening and connecting pipe, then lower it into place evenly. | The body is centered and sits level; the pipe is not pushing the drain sideways. | Tilting, twisting, or levering the body into position, which can shift or pinch the gasket. |
| 5 | Seat the tool-free drain body and gasket with steady, even pressure. Make sure the gasket remains in its intended position as the body engages. | The body is fully seated according to its design, and the gasket is not rolled, folded, or visibly extruded. | Hammering the drain or tightening a retaining part unevenly to compensate for poor alignment. |
| 6 | Check the outlet connection and any retaining components using the method and hand-tightening guidance provided with the drain. | Connections are aligned and secure, with no cross-threading or unnecessary strain on the pipe. | Over-tightening or using tools where the instructions specify a tool-free connection. |
| 7 | Test the completed drain for leaks before closing in the floor or shower assembly. Follow the system instructions for the test method and water level. | No water escapes around the drain body or connection during the prescribed test. | Covering the connection before inspection or relying only on a visual check without a water test. |
Note: Drain designs and installation requirements vary. Follow the instructions supplied for the specific drain and shower system, and check applicable local plumbing requirements.
A tool-free floor drain can simplify the visible fitting, but the waste pipe still needs careful layout. The 2021 International Plumbing Code (IPC), Table 704.1, specifies a minimum slope of 1/4 inch per foot for horizontal drainage pipes 2½ inches or smaller. That is about a 2.08% fall. Small detail. Big effect.
Mark the pipe route before making the final connection. For every 12 inches of horizontal run, allow the pipe to drop 1/4 inch toward the drain’s outlet. A tape measure, level, and straightedge help check the fall; do not rely on the floor’s appearance. Dry-fit the sections and check that joints remain fully seated. A sag between supports can hold water and debris, even when both ends appear correctly aligned. The IPC also distinguishes larger pipe sizes, so confirm the applicable table row rather than carrying this slope over to every diameter.
After assembly, run water through the drain and inspect the joints and nearby floor for leaks or pooling. Keep the pipe supported while checking it. I would recheck the measurement before closing the floor; it is easy to lose a small amount of fall during fitting. Local plumbing requirements may use a different adopted IPC edition or amendments, so verify the rules that apply to the project.
Tip: Before installing the tool-free drain, clean the sealing surfaces and remove grit. Check that the gasket sits flat and the outlet lines up without strain. Follow the drain’s instructions for the required floor slope and connection depth. A joint that looks straight can still be misaligned. Don’t force it.
Tip: Test the drain before covering the floor. Pour water slowly into the drain, then check each visible connection with a dry tissue. Look beneath the base and around the outlet for damp spots or small drops. Wait a few minutes, then inspect again. Small leaks hide.
Tip: If water collects around the drain instead of flowing away, pause and check the slope and drain position. Tighten connections only as directed; overtightening can shift a seal. I’d rather repeat a careful test than discover a damp joint after the finish is down. If anything remains wet, correct it and test again before proceeding. Follow the product instructions for any additional water test required.
A common target is a 1/4-inch drop per horizontal foot. That makes a 1-inch fall across four feet. Check your installation instructions before the surface cures.
Mark the planned fall on the walls. Use a straightedge, level, and 1/4-inch spacer to check each section. Recheck near the drain; small height changes can redirect water.
Yes. Check each sloped plane separately, since water approaches a centered drain from several directions. Look for ridges and shallow pockets. Small errors show.
Remove grit, old sealant, and moisture from the seating surface. Confirm the gasket type and orientation using the drain instructions. A clean, flat surface helps it seal evenly.
Lower the body carefully without dragging the gasket across sharp edges. Keep it level, then press gently and evenly around the rim. Pause if it resists.
Yes. Excessive hand pressure can distort a soft gasket. Secure the drain only as directed, and check that the gasket has no folded or squeezed-out edges.
Pour water slowly through the drain. Check visible joints, the area beneath the base, and the outlet with a dry tissue. Wait a few minutes and inspect again. Small leaks hide.
Pause and check the floor slope, drain position, and connections. Reseat a misplaced gasket instead of covering a leak with extra sealant. I still double-check, even when everything looks neat.
A successful Tool Free Easy Install Floor Drain installation starts with checking that the drain is compatible with the shower-floor system, that its outlet matches the waste pipe, and that its rated flow can handle the expected water volume. Shape the shower floor with a typical slope of 1/4 inch per foot toward the drain so water moves efficiently without pooling. Follow the product’s installation instructions, and make sure the drain body and gasket sit evenly; forcing or twisting the seal can compromise the fit.
The waste pipe should also maintain the appropriate slope—commonly 1/4 inch per foot for IPC pipes 2½ inches or smaller—while meeting applicable local requirements. Before finishing the floor, run water through the drain and inspect the drain connection and every accessible pipe joint for leaks. Taking time to verify compatibility, slope, sealing, and drainage helps catch problems early and supports a dependable installation.

Xianglong