Choosing Cuttable Shower Drains in 2026 starts with the room, not the product photo. Measure the finished shower width, note the outlet position, and check where the tile meets the drain. A channel that can be trimmed may help fit an alcove or an uneven wall. But “cuttable” does not mean every component can be shortened. Small details matter.
Look closely at the manufacturer’s cutting marks, installation guide, and approved grate materials. Confirm the drain’s flow capacity suits the showerhead and expected water use. Also check how the drain connects to the waterproofing system. A neat stainless-steel edge is useful, but it cannot compensate for poor slope or a weak membrane connection. Keep the drain body and flange intact unless the product instructions explicitly allow changes. That is not trivial.
This guide explains what to compare before buying Cuttable Shower Drains, including length, outlet location, tile compatibility, cleaning access, and installation demands. It also considers the difference between a channel that can be trimmed and one that merely comes in several sizes. If possible, compare the planned drain position with the actual tile layout before work begins. One awkward truth: cuts made on site can expose small measurement errors that drawings hide. Follow the product instructions, and ask a qualified installer to verify the waterproofing and drainage details when the assembly is unfamiliar. A careful fit is worth the extra check.
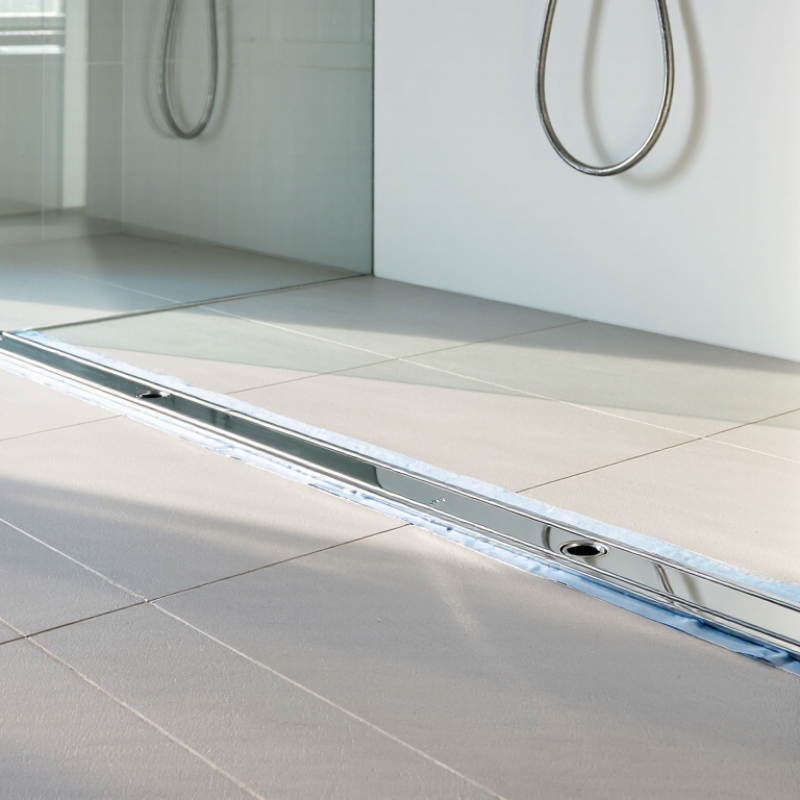
A cuttable shower drain is designed to be shortened on site to fit a planned shower opening. Its channel and, in some systems, its grate can be trimmed to length. Water enters through the narrow opening or grate, flows along the channel, then exits through the drain outlet. That matters in showers where walls are not perfectly square. Small errors happen.
The installer measures the finished opening, checks the outlet position, and cuts only the parts the instructions identify as cuttable. A fine-tooth saw can help make a cleaner edge; sharp burrs should be removed before assembly. The drain must still sit level and connect correctly to the waste pipe. Its waterproofing flange also needs a compatible, sealed connection to the shower membrane. A neat-looking cut cannot compensate for a poor seal or incorrect floor slope.
Tips: Measure twice, including tile thickness and end gaps. Dry-fit the channel before bonding it in place. Never cut near the outlet or through a sealed joint unless the manufacturer’s instructions explicitly allow it. If the system’s limits are unclear, pause and confirm them before installation.
Choosing a cuttable shower drain starts with the room, not the product photo. Measure the shower’s clear width and note whether the drain will sit near a wall or across the floor. Check the tile pattern, too. A grate that ends awkwardly beside a tile edge can make a careful installation look unfinished. Measure twice.
Floor slope determines how water reaches the drain. Many shower floors are planned around a fall of roughly 1/4 inch per foot, but confirm the drain instructions and local requirements before setting the bed. Watch for dips near corners and the curb; water can linger there even when the center looks level. A small mock-up with a straightedge can reveal trouble early.
Installation constraints may narrow your options. Locate joists, the trap, and the waste pipe, then check outlet direction and available floor depth. Confirm exactly where the drain channel may be cut; trimming beyond its designated zone can compromise its fit or water control. Coordinate the drain height with the finished tile, waterproofing layer, and adhesive thickness. A neat plan can still be wrong if those layers are guessed. When access below the floor is limited, verify measurements before closing it up.
Drain material matters in a wet, frequently cleaned shower. Stainless steel resists corrosion and feels substantial, while polymer components can reduce cost and weight. Check the stated grade, finish, and compatibility with cleaning products; “stainless” alone does not tell the whole story. There is a trade-off. A polished grate may show water spots, while a darker finish can reveal soap residue.
Grate style affects both appearance and maintenance. Tile-in grates create a quieter visual line, but grout edges need careful installation. Slotted or perforated covers are easier to lift and clean. For a cuttable linear drain, confirm exactly which section can be shortened and how the cut end is sealed. Never assume the grate and drain body can be cut in the same way. Small details matter.
Flow capacity deserves more attention than appearance. The EPA WaterSense Specification for Showerheads sets a maximum rate of 2.0 gallons per minute; the federal baseline is 2.5 gpm. Treat that as one fixture’s flow, not the drain’s required capacity. Add the rated flow of every showerhead and body spray, then compare the total with the drain’s tested capacity at the specified water depth. Leave practical margin. A high-flow setup can overwhelm a drain that performs well under a single showerhead. Installation slope and debris can reduce real-world drainage, too. I would verify the test conditions before choosing.
2026 How to Choose Cuttable Shower Drains?
A cuttable shower drain must fit the finished opening without weakening its channel or waterproofing flange. Check the installation sheet for the maximum trim length and the minimum permitted end clearance. Cut only the sections the instructions identify; do not assume the grate, channel, and outlet can all be shortened. Measure twice. A small mismatch can leave the grate off-center or the end cap poorly sealed.
Confirm the outlet position, pipe diameter, drain height, and connection type before ordering. A 2-inch outlet is common, but the existing waste line and project requirements still matter. The Tile Council of North America’s Handbook provides guidance on shower assemblies and drainage; use its applicable details alongside the drain instructions. Check that the chosen membrane connects to the drain’s bonding or clamping flange. Keep the shower floor slope consistent with the specified assembly, rather than trying to correct it with sealant.
Waterproofing deserves careful planning. The 2024 U.S. Houzz & Home Study reported a $15,000 median spend for bathroom renovations in 2023. That figure is not a drain-specific cost, but it shows why protecting finished work matters. Dry-fit the channel, inspect cut edges, and test the drain connection before covering it. It is easy to overlook the membrane transition when the tile layout looks perfect. That deserves a second check.
The International Plumbing Code specifies a shower-floor slope of 1/4 to 1/2 inch per foot—about 2.08% to 4.17%. Check local requirements, the drain manufacturer’s exact cutting limits, outlet size and location, and compatibility with the waterproofing system before installation. Cutting limits vary by model; there is no universal limit.
A cuttable shower drain still has to fit the plumbing rules adopted where the home is built. The 2021 International Plumbing Code, Section 417.3, sets a minimum 1½-inch (38 mm) shower waste outlet. Local amendments may differ, so confirm the current requirement with the plumbing inspector before ordering. Check the drain outlet, trap connection, and specified flow capacity together; a long grate does not guarantee a suitable pipe connection.
Small detail. It matters.
The drain also needs to work with the shower’s waterproofing system and floor slope. Confirm the cut zone does not remove a sealed end, membrane connection, or required fastening point. Keep the grate removable, and check that hair and debris can be cleared without dismantling tile. ICC code provisions offer a measurable baseline, but they do not replace the drain’s installation instructions or local approval. A clean-looking installation can still be awkward to service. Measure the finished opening, not just the rough framing, and leave enough access for routine cleaning.
Measure the finished shower width and opening. Note whether the drain sits near a wall or across the floor. Measure twice.
The slope guides water toward the drain. A common planning figure is about 1/4 inch per foot, but check the drain instructions and local requirements. Corners can still hold water.
Check the installation instructions for the permitted cut zone and maximum trim length. The grate, channel, and outlet may have different limits. Don’t guess.
Check outlet position, pipe diameter, connection type, and drain height. A 2-inch outlet is common, but the existing pipe and project requirements matter.
Locate the joists, trap, and waste pipe. Confirm available floor depth and outlet direction before closing the floor. A neat plan can still miss something.
Confirm that the membrane matches the drain’s bonding or clamping flange. Dry-fit the channel and inspect the membrane transition before covering it. Check again.
Coordinate the drain height with tile, adhesive, and waterproofing thickness. Inspect cut edges and test the drain connection first. Small details matter.
Choose a design with a removable grate and accessible debris area. Measure the finished opening, not only the rough framing. Cleaning access is easy to overlook.
Yes. Confirm the required outlet size, trap connection, and flow capacity with local authorities before ordering. A long grate does not guarantee a suitable pipe connection.
Cuttable Shower Drains offer flexibility when a standard drain size or configuration does not fit a shower layout. Before choosing one, assess the shower’s dimensions, floor slope, drain position, and installation constraints. These details help determine whether the drain can align with the plumbing while supporting proper water flow and a consistent floor finish.
Compare available materials and grate styles, then check the drain’s flow capacity against the shower’s expected water use. Confirm the permitted cutting range and make sure any adjustment will not compromise the drain’s structure, plumbing connection, or waterproofing system. Finally, select a design that is practical to clean and maintain and meets applicable local building and plumbing codes. Careful planning can help ensure a suitable fit, reliable drainage, and lasting performance.

Xianglong